Key takeaways
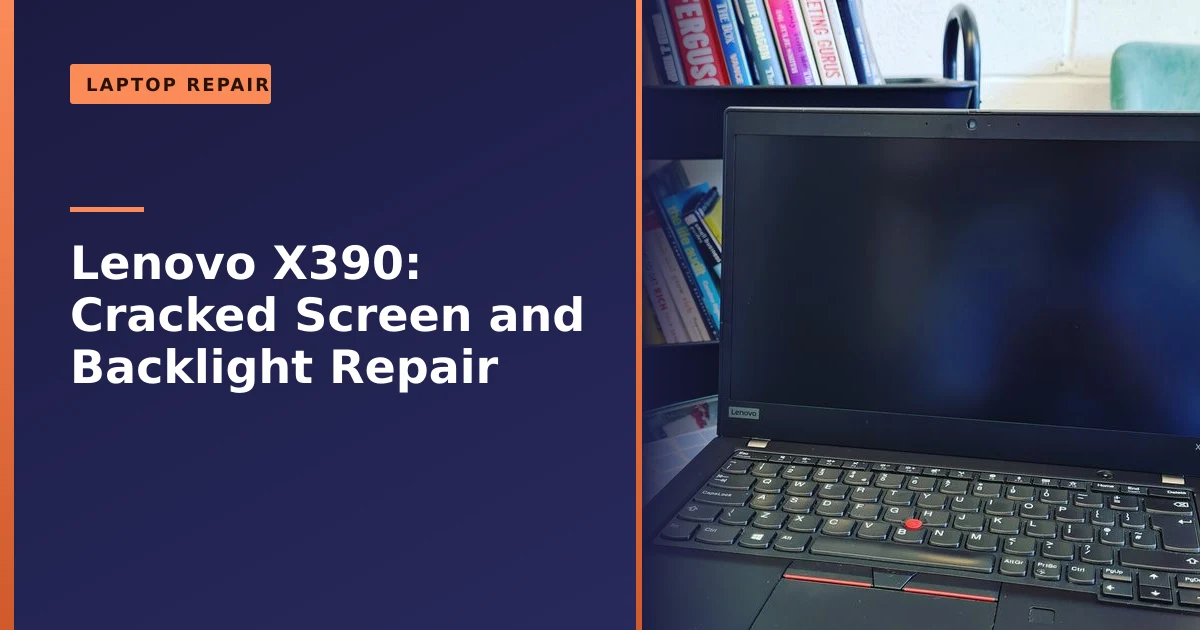
- This Lenovo X390 had a cracked LCD, and a DIY screen replacement had left the backlight not working.
- We diagnosed the fault precisely, distinguishing a genuinely faulty panel from a backlight fault that sits on the mainboard, fitted the client's replacement screen and fully serviced the laptop.
- A screen that stays dark after a swap is often a backlight fault that sits on the mainboard rather than a faulty panel, so another new screen will not fix it.
- Where a fault is traced to the board itself, we replace the relevant part or the whole board, or advise the most cost-effective route. We do not carry out board-level or soldering repairs.
- A two minute torch test and an external monitor test will usually tell you whether the problem is the panel, the backlight, or the graphics, before you spend a penny on parts.
- The ThinkPad X390 is built to be serviced, which is exactly why repairing it made far more sense than scrapping it.
Replaced a laptop screen but it is still dark? The panel may not be the whole story. This Lenovo X390 arrived in Manchester with a cracked LCD, and after the owner fitted a replacement screen, the backlight still refused to work, leaving a dark display. The fault was not in the panel at all, but in the backlight, whose power comes from the laptop's mainboard. Our job was to diagnose that precisely before any more money was spent on parts. Here is what was going on, and how you can work out the same thing at home before you buy any more parts.
What came in: a screen swap that did not work
The Lenovo X390 is a sleek, capable business laptop, and this one had suffered a cracked LCD screen. The owner had sensibly tried to replace the damaged screen themselves, but hit a frustrating roadblock: even with a new panel, the backlight would not come on, so the display stayed dark. They brought it to us, and after assessing the damage we gave a quote they were happy with and collected the laptop.
It is a situation we see often. Someone does everything right, orders a panel that matches the model, takes their time with the bezel, seats the cable, and powers on expecting a crisp new display. Instead they get a screen that is technically working but completely dark. At that point most people assume they bought a dud panel and order a second one, which is the expensive mistake this article is written to help you avoid. The X390 owner did the smart thing instead and had the laptop diagnosed properly, which is how we found the fault was never in the panel at all.
How a laptop screen actually lights up
To understand why a new screen can still be dark, it helps to know that an LCD panel does not make its own light. As the technical description on liquid crystal displays puts it, LCDs do not produce light on their own, so they require an external light source to produce a visible image. The liquid crystal layer behaves like a tiny shutter for every pixel, twisting to let light through or block it. Without something shining behind it, the panel is just a sheet of glass with no picture you can see.
That light comes from the backlight. On almost every laptop made in the last decade or so, the backlight is a strip of tiny LEDs running along one edge of the panel, behind a light guide that spreads the glow evenly across the whole screen. Older laptops used a thin fluorescent tube (a CCFL) with a separate inverter board to drive it, but as the reference on backlight technology explains, edge-lit LED designs took over because they are thinner, cheaper and more efficient. The X390 is firmly in the LED era.
Here is the crucial part. Those LEDs need a specific voltage to light up, usually somewhere in the region of 20 to 40 volts, which is much higher than the rest of the laptop's low-voltage logic. A dedicated section of the mainboard, the backlight driver or boost circuit, takes the laptop's normal supply and steps it up to feed the LED strip. Between that circuit and the panel there is also a small protective fuse and the display cable. Every one of those links has to work for the screen to light. The panel is only the last component in a chain, and if any earlier link is broken, a brand-new panel changes nothing.
How we diagnosed it: panel fault or backlight fault
The clue was that a new screen alone did not bring the display back, which pointed away from the panel and towards the backlight, whose power comes from a section of the laptop's mainboard rather than the panel itself. Our job here was diagnosis: distinguishing a genuinely faulty panel from a backlight fault that sits on the board, so the owner was not left buying a second panel that would never have helped. We fitted the owner's replacement LCD and gave the X390 a full service, checking the hardware and software over to optimise its performance and catch any hidden issues. Where a fault is traced to the board itself, we replace the relevant part or the whole board, or advise the most cost-effective route. We do not carry out board-level or soldering repairs.
Diagnosing a backlight fault means working out exactly where the chain breaks. A technician checks the protective fuse for continuity, looks at the boost circuit that generates the high voltage for the LEDs, and inspects the connector and traces around the display cable port, because a blown fuse, a failed driver, or a damaged component in that circuit will all leave the LEDs unpowered. That precise diagnosis is what tells you whether the answer is a new panel, a new cable, or a fault that sits on the board. Where the fault sits on the board, we replace the relevant part or the whole board, or advise the best route, rather than soldering individual components.
Why a new screen sometimes is not enough
It catches a lot of people out: you fit a brand-new screen, but the display stays black. The reason is that a laptop screen relies on more than just the panel, it needs a working backlight, and the power for that backlight comes through circuitry on the laptop's board. If a knock or a fault has damaged that backlight circuit, a new panel will still appear dark, because the problem is upstream of the screen itself.
Diagnosing this requires the ability to trace the fault along that chain rather than simply swapping parts. Pinning down whether the fault is the panel or the backlight on the board is exactly what rescues a laptop that seems beyond a straightforward fix, and it is far cheaper than throwing parts at the problem on guesswork. A cracked screen is one of the most common laptop faults, as our laptop screen repair page explains, but when the backlight is involved, careful diagnosis makes the difference.
The five reasons a brand-new screen can still be dark
When a freshly fitted panel stays black or barely visible, the cause is almost always one of a handful of things. Knowing which is which saves you from throwing parts at the problem. Here are the usual suspects, roughly in the order a good technician checks them.
| Likely cause | What you see | How it is fixed |
|---|---|---|
| Backlight fuse blown | Faint image visible under a torch, no brightness at all | Traced to the board. We replace the relevant part or the whole board, or advise the best route, not solder |
| Backlight driver circuit failed | Dark screen, faint image under a torch, often after a knock or surge | Traced to the board (this was the X390). We replace the relevant part or the whole board, or advise |
| Display cable not seated, reversed, or damaged | Black, flickering, lines, or display only at certain lid angles | Reseat the cable correctly, or replace the cable if pins are damaged |
| Panel LED strip faulty | Dark even with a known-good board, sometimes a brief flash at power on | Replace the panel with a correctly matched one |
| Graphics (GPU) or mainboard fault | External monitor also blank, or no output at all | Diagnosed to the graphics or power circuitry on the board. We replace the part or board, or advise |
Notice that only one of those five, the panel LED strip, is actually solved by another new screen. That is why ordering a second panel on a hunch so often fails: four times out of five the panel was never the problem. The torch test and external monitor test below tell these causes apart in minutes.
Diagnose it yourself in ten minutes: the torch and external monitor tests
You do not need any special equipment to narrow this right down. Two simple, safe tests will tell you whether the fault is the backlight, the panel, the cable, or the graphics. Repair forums and screen suppliers recommend exactly this sequence, and it is the same logic we follow on the bench.
Test 1: the torch test
- Power the laptop on and let it boot. If you usually log in, the login screen will be loaded even if you cannot see it.
- In a dim room, shine a bright torch or your phone light at the screen at a shallow angle, close to the glass.
- Look carefully for a very faint image of your desktop or login screen.
- If you can see a ghostly image: the panel and graphics are working, and the backlight is the problem. That means the LED strip, the fuse, or the driver circuit, in other words a backlight fault rather than necessarily a new screen.
- If you see nothing at all under the torch: move on to the external monitor test, because the issue may be the cable, the panel itself, or the graphics.
Test 2: the external monitor test
- Connect the laptop to an external monitor or TV using HDMI, USB-C, or a docking station.
- Power on and watch the external screen. You may need to press the display toggle keys to switch output.
- If the external monitor shows a perfect picture: the graphics chip and the rest of the laptop are fine. The fault is in the display path, the cable, the backlight, or the panel.
- If the external monitor is also blank or garbled: the problem is more likely the graphics circuitry or mainboard, which is a board-level diagnosis rather than a screen job.
Run those two tests together and you can usually place the fault before spending anything. In the X390's case, a faint torch-lit image plus a perfect external display would point squarely at the backlight, which is precisely what we found. If you would rather not open or fiddle with the machine at all, that is fine too, this is exactly the kind of thing we check first when a laptop comes in.
The risks of a DIY screen swap, and how this one ended up dark
Attempting your own screen replacement is admirable, and often the panel is the only issue. But the display assembly is one of the most delicate parts of any laptop, and a few honest mistakes can turn a simple panel swap into a deeper fault on the board. These are the ones that bite people most often:
- The display ribbon cable. It is thin, fragile, and where most DIY attempts go wrong. It should be pulled straight out, never at an angle, and pushed straight back in. Forcing it, kinking it, or seating it crooked can tear the cable or short the pins, which can damage the panel or the backlight circuit.
- Plugging the cable in reversed. On some designs the connector can go in the wrong way round. Get this wrong and it will not work, and it can short pins and harm the LCD or the board.
- Static discharge. A static shock you cannot even feel can quietly kill sensitive components. Working without an anti-static strap is a real risk to the mainboard.
- The wrong panel. Screens that look identical can differ in connector pin count, resolution, mounting points, or backlight wiring. A 30-pin panel will not work on a 40-pin system even though the plug looks similar.
- Cracking the new panel. LCD glass is brittle. Prising the bezel, over-tightening screws, or flexing the panel during fitting can crack the replacement before it is even working.
When a display stays dark after a swap, it is a sign the fault runs deeper than a panel can fix. Rather than buy more parts on guesswork, it is worth having it properly diagnosed, because the underlying cause, like this backlight fault, needs pinning down before you know whether the answer is a part, a cable, or the board. None of this is meant to put you off having a go. It is simply why a careful diagnosis pays for itself: it stops you spending on a second or third panel when the real fault was never in the panel at all.
Cracked screen replacement basics: getting the right panel
If your screen really is just cracked and the rest of the laptop is healthy, a panel swap is one of the more achievable repairs, as long as you order the correct part. The most common confusion is between the two things that can break on the front of a laptop:
- The LCD is the inner part that produces the image. If the picture is broken, distorted, or showing lines and blotches, the LCD needs replacing.
- The digitizer is the touch glass on touchscreen models. If the image is perfect but the touch glass is shattered, it is the digitizer that needs attention.
On many touchscreen laptops the LCD and digitizer are bonded together and sold as one assembly, so you replace both at once. On non-touch laptops like a standard X390, you are simply fitting a new LCD panel. The golden rule is to match the exact part: the same resolution, the same connector and pin count, and the same mounting and backlight type. The safest way to get this right is to read the model number printed on the back of the original panel and match that, rather than guessing from the laptop model alone, because a single laptop model can ship with several different panels. If you would like a hand identifying the right part, our guide to finding your laptop model number walks you through it, and we recently covered a straightforward HP Pavilion screen replacement that shows what a clean panel swap looks like.
A part, a new board, or a new laptop: the numbers
Once you know a fault lives on the mainboard, the next question is how best to put it right. Some board faults come down to a serviceable part, a connector or a module, that can simply be replaced. Where the fault sits in the soldered circuitry, we do not carry out board-level soldering, so the honest options are a replacement board or, if that is not sensible, a new laptop, and we will always advise the most cost-effective route. A replacement laptop motherboard is often a proprietary part that runs into the low hundreds, plus the considerable labour of stripping the laptop down to swap it, so it is worth weighing against the value of the machine.
| Approach | Typical scope | When it makes sense |
|---|---|---|
| Replace the faulty part | Fit a replacement serviceable part, cable or connector | Fault is isolated to a part that can be swapped without soldering |
| Whole board replacement | Fit a whole new mainboard | Fault is in the soldered circuitry, the board is cracked, or the right part is not obtainable |
| Replace the laptop | Buy a new machine | Repair cost approaches the value of a comparable replacement, or the laptop is very old |
A reasonable rule of thumb the repair trade uses is that if a fix costs less than roughly 40 to 50 per cent of a comparable replacement, repairing usually makes sense, especially on a machine that is only a few years old. Where a fault comes down to a serviceable part, that is easily met, and even a whole-board replacement can be worthwhile on a machine that is otherwise sound and worth keeping. It is also the greener choice, keeping a working laptop out of landfill and supporting the wider right to repair movement. For a fuller breakdown of when a fix is worth it, see our guide on repair versus replace and our page on how much it costs to fix a laptop.
When DIY hits a wall
Attempting your own screen replacement is admirable, and often the panel is the only issue. But when the display stays dark afterwards, it is a sign the fault runs deeper than a swap can fix. Rather than buy more parts on guesswork, it is worth having it properly diagnosed, because the underlying cause, like this backlight fault, needs pinning down before you know the right way to put it right.
A sensible point to stop and call a professional is when you have confirmed with the torch and monitor tests that the panel is not the problem, when reseating the cable does not help, or when the fault clearly sits on the board. Backlight driver circuits run at higher voltages and need a multimeter and the right schematics to diagnose safely, which is well beyond a parts swap. At that point we diagnose the fault precisely and, where it sits on the board, replace the relevant part or the whole board, or advise the best route, rather than soldering. Bringing it in then is usually cheaper than the parts you would otherwise buy chasing the fault yourself.
Why the ThinkPad X390 was worth repairing
Part of the reason repairing this one made so much sense is the machine itself. The ThinkPad X390 is a business-class 13.3 inch laptop built to be maintained. Lenovo publishes a full hardware maintenance manual for it, and the display, mainboard, battery and storage are all documented as serviceable parts, with community repair guides available on resources like iFixit. ThinkPads have a long-standing reputation for serviceability, which means a fault that would write off a glued-shut ultrabook is often very much fixable.
That serviceability is exactly why repairing rather than replacing this X390 was the right call. A well-specified ThinkPad has years of useful life left once the screen and backlight are sorted, and the owner kept a laptop they already knew and trusted instead of starting again. We have brought plenty of older ThinkPads back from the brink, including the remarkable revival of a Lenovo X230, and the X series keeps earning its keep precisely because it is designed to be opened and fixed. To keep yours in good health between repairs, our laptop care guide covers the basics that prevent a lot of avoidable damage.
Myths and facts about dark laptop screens
A few stubborn myths cause people to spend money they did not need to. Here are the ones worth clearing up.
- Myth: a dark screen always means a dead screen. Fact: if a torch reveals a faint image, the panel is working and only the backlight needs attention.
- Myth: if a new panel did not fix it, the laptop is beyond repair. Fact: it usually means the fault is on the board, and once it is diagnosed there is often a sensible and cost-effective way to put it right.
- Myth: any screen with the same connector will fit. Fact: pin count, resolution and backlight wiring must all match, not just the plug shape.
- Myth: a board fault always means a new motherboard. Fact: a board fault is often isolated to a specific serviceable part, and where it is not, we replace the board or advise the best route rather than assuming the whole laptop is done for.
How Manchester PC can help
If your laptop screen is cracked, dark, or stayed black after a DIY swap, we can help. We replace screens and diagnose backlight and display faults precisely, so you are not left buying panel after panel. Where a fault is traced to the board itself, we replace the relevant part or the whole board, or advise the most cost-effective route. We do not carry out board-level or soldering repairs. We quote up front, and we will run the same torch and external monitor checks described above to pin down the real fault before any work begins.
We cover Manchester and the surrounding areas with free local collection and return, fair pricing and honest advice, we will always tell you when a repair is not worth it rather than push one. For a Lenovo laptop repair or screen repair or any computer repair, get a free, no-obligation quote or call us on 0161 820 1992.